How to Choose a Water Pressure Sump Pump in 2026

Choosing a water pressure sump pump in 2026 requires more than comparing horsepower and price. A reliable decision begins with the basement’s actual conditions. Measure the pit depth, discharge height, pipe length, and expected inflow during heavy rain. A pump that performs well on a dry afternoon may struggle when groundwater rises quickly.

Pump-system engineer Daniel P. Sweeney offers a useful warning: “Select the pump for real operating conditions, not its largest number on the box.” That principle matters. A model’s advertised gallons per hour may be measured with no vertical lift. Once water climbs eight or ten feet, performance can drop sharply. Check the pump curve, not just the label.

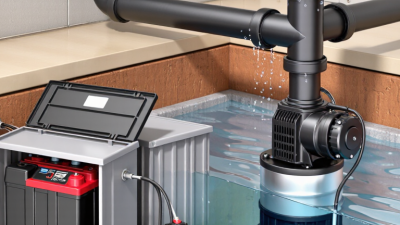
Look closely at the float switch, check valve, basin size, and discharge route. A narrow pipe can restrict flow. A poorly positioned float can leave water behind. Battery backup and a high-water alarm add protection when storms cause outages. They are not decorative extras.

There is room for doubt here. Bigger is not always better. An oversized pump may cycle too often, waste energy, or overwhelm weak plumbing. A cheaper model may also cost more after one flooded weekend. The right water pressure sump pump should match the building, the water path, and the risks around it. This guide examines those choices with practical measurements, current specifications, and a cautious eye toward claims that sound impressive but lack field context.
How to Choose a Water Pressure Sump Pump in 2026

What a Water Pressure Sump Pump Is and How It Works

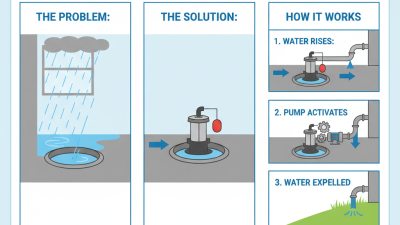
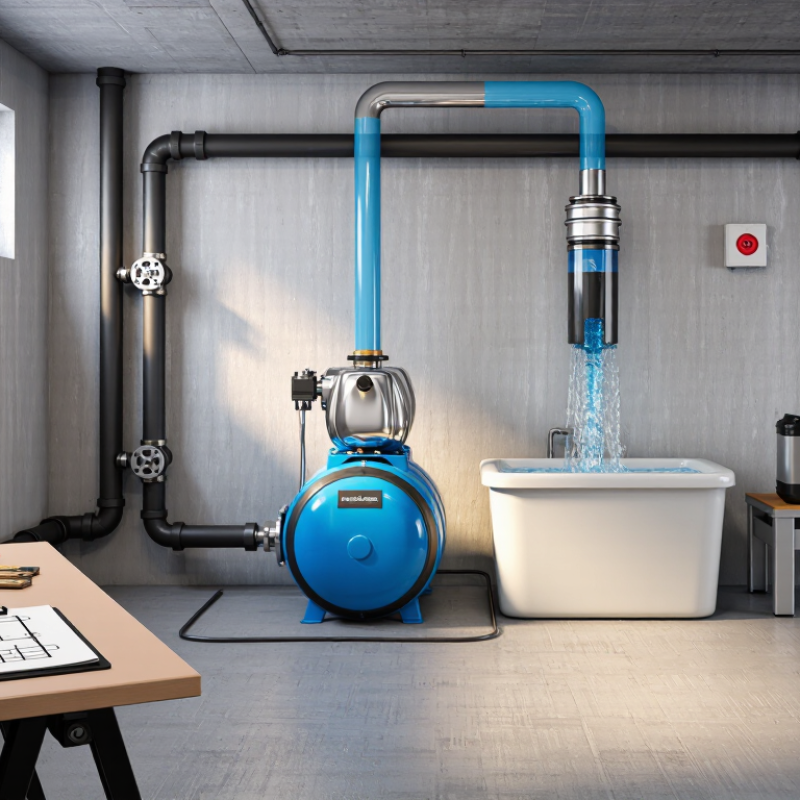
A water pressure sump pump is a backup device powered by municipal water pressure. It does not rely on electricity or a battery. When rising water lifts the float, a valve opens and sends pressurized water through a narrow nozzle. This creates suction, pulling sump water into the discharge pipe.

Pressure matters. The pump needs adequate inlet pressure and flow to operate correctly. A check valve prevents discharged water from returning, while a backflow protection device helps protect the household supply. The discharge line must also move water away from the foundation. A clean diagram can hide a poor installation.

Water consumption deserves attention. EPA WaterSense estimates that household leaks waste nearly 1 trillion gallons annually in the United States. A water-powered pump can add unnecessary demand if its valve leaks or operates too often. Plumbing guidance from ASPE emphasizes correct sizing, flow control, and backflow protection for pressure-driven systems. FEMA’s National Risk Index also identifies flooding as a major hazard, supporting the need for dependable backup drainage.

During a real inspection, I would measure pressure at the pump inlet, not trust a label. Municipal pressure may change during peak use. That tradeoff is real. A pressure pump may work during an outage, yet it can drain significant potable water during a long storm. Test it manually, inspect the valve, and check the discharge route before choosing one.

How to Assess Your Basement’s Water Pressure and Drainage Needs

How to Choose a Water Pressure Sump Pump in 2026

Assessing your basement’s water pressure starts with observation, not guesswork. Check the sump pit during a heavy storm, when groundwater pressure is most revealing. Measure the water level before pumping and again after ten minutes. A fast refill suggests strong inflow or restricted drainage. Use a pressure gauge if your system includes a connected water line, but do not confuse supply pressure with groundwater pressure. They are different problems.

Tips: Inspect the pit, inlet pipes, discharge pipe, and check valve. Record the pipe diameter and the vertical lift to the outlet. Measure the horizontal discharge distance too. A pump must overcome total head, not just move water from the pit. Keep the discharge outlet away from the foundation, and follow local drainage requirements. If water backs up near the outlet, the pump may be working against poor drainage.

In practical inspections, I have seen homeowners choose a powerful pump for a narrow discharge pipe. It sounded reasonable, but the restricted pipe reduced real performance. That mistake is easy to repeat. Look for a pump curve showing flow at your measured head. Test the backup plan as well. A float switch can stick, and a battery may not last through a long outage. Photograph the setup and review it each year. Small details matter.

How to Choose a Water Pressure Sump Pump in 2026

Assessing Basement Water Pressure and Drainage Needs

This chart converts water pressure into the equivalent vertical water head used when sizing a sump pump. The relationship is based on 1 psi equaling approximately 2.31 feet of water head. Add the vertical lift from the sump pit to the discharge point and account for pipe friction and fittings before selecting a pump. Higher required head reduces the pump’s actual flow rate, so drainage capacity should be checked at the system’s operating head rather than at zero lift.

Which Pump Type, Capacity, and Power Source Fit Your Property

Choosing a Water Pressure Sump Pump in 2026

The right pump depends on your property, not only the advertised horsepower. A submersible pump suits a deep sump basin and usually runs quietly below the water. A pedestal pump keeps its motor above the basin, making inspection easier in narrow spaces. However, it can be noisier. I once selected a pump by its maximum flow rate and ignored the discharge height. That was a costly mistake.

Measure the water entering the basin during heavy rain. Then measure the vertical lift from the pump to the outlet. Use the pump’s rated flow at that total head, not its free-flow figure. A basement with rapid inflow may need higher capacity, while a small crawl space may need less. Oversizing is not always better. Frequent short cycles can wear the switch and motor.

Power source matters during storms. A standard AC pump works well when the electrical supply is dependable. Add a battery backup where outages are common, especially if finished rooms sit below ground level. A generator can support longer outages, but it must be installed and operated safely. Use a dedicated circuit, a properly fitted check valve, and an alarm for rising water. Local electrical requirements may differ, so a qualified professional should inspect the installation. Recheck the pump after the first major storm; real water flow often exposes assumptions that looked reasonable on paper.

How to Compare Materials, Controls, Safety Features, and Maintenance

Choosing a water pressure sump pump starts with materials. Look for corrosion-resistant stainless steel, brass, or reinforced engineering plastic. These materials face constant moisture and mineral deposits. A metal inlet may tolerate repeated connection changes better than a thin plastic fitting. However, heavier does not always mean stronger. Inspect wall thickness, seals, and thread quality instead of trusting weight.

Controls deserve equal attention. A pressure sensor should activate consistently when the main pump fails. Test it with a controlled water-level rise, not only with a button. Some systems include manual and automatic modes. Manual control helps during inspection, but accidental settings can leave the pump inactive. Keep the pressure regulator accessible. A hidden control is difficult to adjust during a storm. I would also compare water usage, operating pressure, and discharge capacity under realistic conditions.

Safety features should include backflow prevention, a pressure relief path, and secure discharge connections. Check that electrical components remain separated from standing water. Local plumbing and electrical requirements still matter, so a qualified installer should verify the setup. Maintenance is simple but easy to postpone. Inspect the inlet screen, valves, fittings, and backup battery area every few months. Flush mineral buildup before it restricts flow. No pump is maintenance-free. A neglected unit can look perfect and still fail when the basement floor is wet. Testing only once a year is better than nothing, but seasonal checks are safer.

How to Install, Test, and Replace a Water Pressure Sump Pump Safely

Choosing a water pressure sump pump in 2026 means checking flow rate, lift height, and water supply pressure. Choose a model rated for your pit depth and discharge route. A pump that sounds powerful may still move too little water. Measure the vertical rise, then add the pipe length and bends. Keep the installation area dry and well lit. Safety comes first.

Before installation, shut off electrical power and close the water supply valve. Never work beside standing water with wet hands. Secure the pump above the pit bottom, then connect the inlet, discharge, and check valve as directed. Use approved fittings and support the pipes to reduce vibration. A backflow device may be necessary when connecting to a household water line. A qualified plumber should verify that connection.

Testing should be deliberate. Open the supply valve slowly and inspect every joint with a dry paper towel. Lift the float or add water to the pit until the pump starts. Confirm steady discharge outside the foundation. Listen for hammering, surging, or repeated cycling. Test the alarm if included. I have found that quick tests miss small leaks. Do not rush this part. Replace the pump when it cannot reach its rated lift, shows cracking, or runs without moving water. Photograph the pipe layout before removal. It prevents avoidable mistakes during replacement.

How to Choose a Water Pressure Sump Pump in 2026 - How to Install, Test, and Replace a Water Pressure Sump Pump Safely

Category Selection or Safety Factor Practical Guidance Typical or Recommended Value
Pump type Water-powered backup sump pump Uses pressurized potable water to operate during a power outage. It is normally installed as a backup rather than the main pump. Suitable only where the property has a reliable municipal water supply and adequate pressure.
Water supply pressure Available pressure at the pump inlet Check pressure under flow, not only static pressure. Pressure may fall when other fixtures are operating. Many water-powered units require approximately 40–90 psi; confirm the exact range in the pump manual.
Discharge lift Vertical distance from pump to discharge outlet Measure the actual vertical rise and include friction from elbows, check valves, and long pipe runs. Choose a pump whose performance chart exceeds the required flow at the measured lift.
Required pumping capacity Flow at the actual discharge head Do not compare pumps using their zero-lift rating. A pump's flow decreases as discharge height increases. Size for the measured inflow and local rainfall conditions; a commonly used residential target is about 20–30 gallons per minute at low lift, subject to site calculations.
Water consumption Municipal water used during operation Water-powered systems discharge both groundwater and operating water. Confirm local water and sewer charges before installation. The ratio varies by model, pressure, and lift; use the manufacturer’s tested consumption chart rather than a universal estimate.
Backflow protection Protection of the potable water supply Install the backflow-prevention device required by local plumbing rules and the pump instructions. Required device depends on local code, water authority rules, and the connection arrangement.
Potable-water connection Dedicated supply branch Use approved potable-water pipe and fittings. Do not connect to a heating loop, irrigation line, or contaminated source. Follow the applicable plumbing code and use a shutoff valve that is accessible for service.
Primary pump arrangement Backup activation level The water-powered backup should start after the primary pump or high-water alarm level, preventing unnecessary water consumption. Set the backup float above the primary pump activation level while keeping adequate clearance below the pit rim.
Sump pit condition Pit size, debris, and float movement Remove sediment and verify that the float or sensor cannot contact the pit wall, pipes, or cables. Use the pump’s specified minimum pit dimensions and maintain unobstructed float travel.
Discharge piping Pipe diameter and routing Use the diameter specified by the pump documentation, minimize sharp bends, support the pipe, and direct water away from the foundation. Keep the outlet protected from freezing and prevent discharged water from returning to the sump.
Check valve Prevention of reverse flow Install only where required by the pump design and place it in the correct flow direction. Confirm the valve’s flow arrow and service access before closing the installation area.
Electrical safety Primary pump and nearby receptacles Keep electrical connections dry, use a properly grounded GFCI-protected receptacle where required, and never handle plugs with wet hands. Follow local electrical code; use a qualified electrician when wiring changes are necessary.
Installation sequence Safe order of work Shut off the water supply and electrical power, secure the pump, connect the discharge, install the approved water-supply and backflow components, then check all joints. Open the water shutoff slowly and inspect for leaks before performing a full operational test.
Initial leak test Water-supply and discharge joints Pressurize the supply gradually and inspect fittings, valves, unions, and pipe penetrations with dry tissue or a visual check. No dripping, seepage, pipe movement, or pressure loss should be present.
Operational test Float or sensor activation Add clean water to the sump until the backup activates. Observe the discharge and confirm that the pump stops automatically. Run at least one complete start-and-stop cycle after installation and after any major service.
Flow verification Actual discharge performance Confirm that water exits at the intended location and does not pool near the foundation or flow toward neighboring property. Performance should meet the pump’s published flow chart at the site’s measured lift and pressure.
Pressure test interval Routine readiness check Test before the wet season, after plumbing work, and whenever water pressure or sump behavior changes. A practical minimum is twice yearly, plus testing before severe storms where feasible.
Maintenance Debris, valves, floats, and discharge outlet Inspect the pit, clean the inlet screen if provided, exercise accessible shutoff valves, and check for freezing or blockage. Inspect at least twice per year and record the test date, pressure, and observed result.
Replacement indicators Unsafe or unreliable operation Replace or professionally repair the unit if it leaks, fails to activate, runs continuously, has damaged components, or cannot meet required flow. Do not rely on age alone; condition, test results, parts availability, and site performance should guide replacement.
Replacement procedure Isolation and removal Close the water shutoff, disconnect power to the primary system if necessary, drain pressure, remove the old unit, and inspect reusable piping. Reuse piping only when it is compatible, undamaged, correctly sized, and permitted by the new pump instructions.
Professional assistance Situations requiring qualified help Use a licensed plumber or electrician for concealed piping, backflow assemblies, code-required connections, electrical modifications, or uncertain water pressure. Stop work immediately if potable-water contamination, flooding, damaged wiring, or uncontrolled leakage is suspected.

Safety note: Exact pressure limits, flow ratings, pipe sizes, backflow requirements, and installation methods vary by pump design and local code. Always verify the pump’s current installation manual and applicable plumbing and electrical regulations before installation, testing, or replacement.